| Today in my post I would like to talk about the steps for creating wedding monograms along with wedding invitation cards at DesignMantic. Our website has the correct tools and attractive designs which could be just for you to bring joys and moments of happiness in your wedding. Moreover, designing here is as easy as a piece of cake. I will present a tutorial and explain step by step how you can design your wedding monogram. |
Related: 20 Elegant Examples of Wedding Monograms |
Step no.1 |
 |
| DesignMantic structure is simple yet innovative and you’d be amazed to see such a nice color theme. |
Step no. 2 |
 |
| The second step for creating wedding monogram is to enter names of groom and bride. You can see two different panels where “Groom” and “Bride” is written. Type the required names there and click on “Show My Monograms for Free”, the icon in red color. |
Step no. 3 |
 |
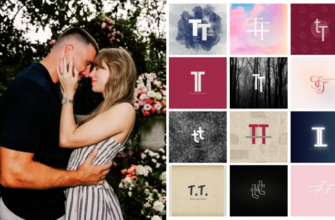
| Once you have clicked the button, you would be directed to a new page. Here a number of designs will be available for you. Select the monogram that goes best with the Groom and Bride’s name. Just do not forget to check all the design pages. Who knows, your dream design might be at a different page. |
Step no. 4 |
 |
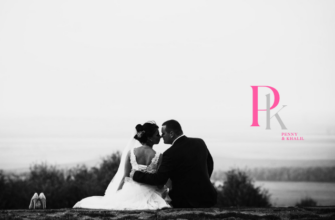
| Now see, the fourth step is where the design I chose is selected. In this new page, you would be given the choice to alter your design as you like. For the viewers ease, the design has been made in different color layers so that one can change it if he/she likes. |
Step no. 5 |
 |
| You can still see the raw design I chose. I will show you how the color and size can be altered. Click on the monogram. See there are different layers for the text and design. First click on the monogram design. In my case, its two wine glasses you see. Once you have clicked it’s highlighted. |
Step no. 6 |
 |
| Now click on “Layer 1 color”. Here you can see a panel of colors opened up in a separate window. Choose the color that matches your monogram design and text. For my case, it was magenta. |
Step no. 7 |
 |
| Now that you have adjusted the design color, it’s the turn of your text to be altered. In my case, I click on “Jack”. Right after it I am given the choice to change the font type, font style, logo text and its color. I can even rotate the object or position it according to my needs. The same goes for you. Choose the best. |
Step no. 8 |
 |
| Now I change my text color as well. See it has been changed to one of the magenta’s shades. |
Step no. 9 |
 |
| Now finally I am done with my color and text. Looks cool, huh? Do not forget to change the wedding date. |
Step no. 10 |
 |
| Now click on the “Download” Button at the bottom right. |
Step no. 11 |
 |
| You would have to register yourself to the website in order to proceed. Make an account first then you’d be directed to your page. |
Step no. 12 |
 |
| This is the last step before you actually receive the designs you made. Click on “Continue to Checkout” and follow the instructions. |
|
I hope you this tutorial helped you in creating lovely wedding monograms and invitation cards. In case of difficulty, just ask. 🙂 |
Creating a Modern Wedding Monogram – A DesignMantic Tutorial -
Featured Image: Unsplash/Orio Nguyen